Oven Construction -
We hope that you enjoy our step-by-step journey on building our pizza oven. We highly recommend you thoroughly read the Bread Builders book to fully understand the mathematics of building the oven, to give you the proper air-flow needed. It would be a shame (and we've seen it) for one to lift 1,000's of pounds of cement and brick... only to tear it up and start over.
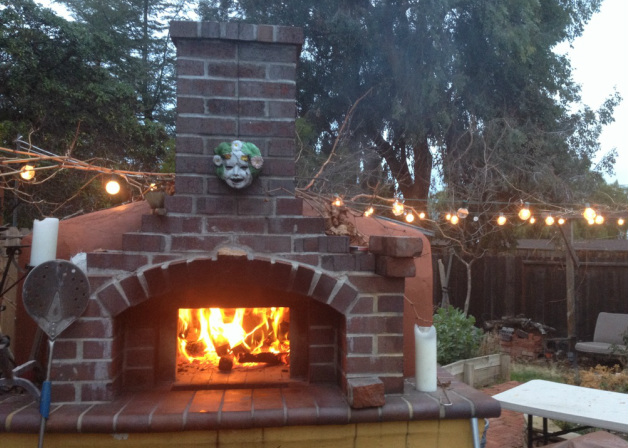
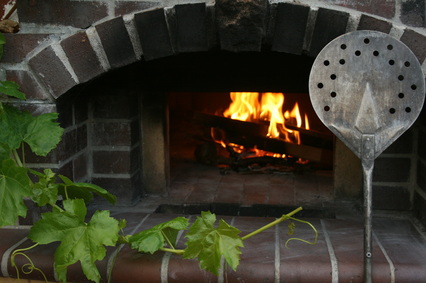
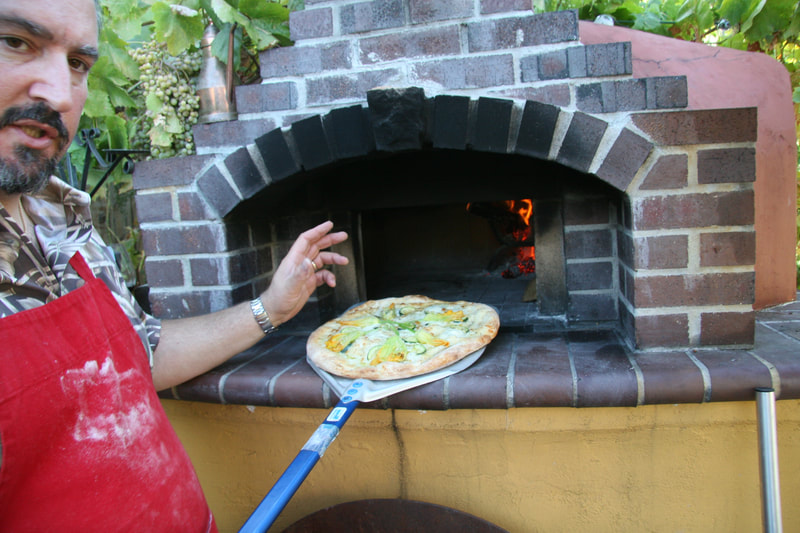
Our oven today... firing up for a 7am bread baking day...
The ground footing...
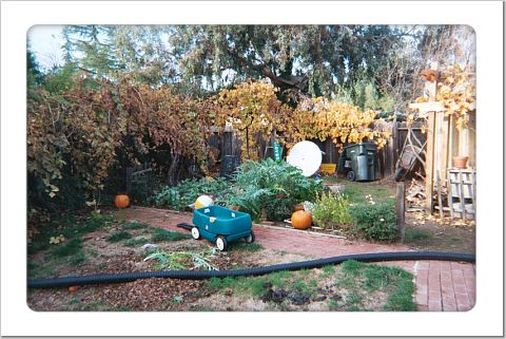 our backyard before the oven was built
July, 2003: The back yard was a mixture of an old shed, a flat area for a vegetable garden, and a long strip of grass. We wanted something different. We wanted a We dug the hole for the base of the oven. Hole dug by Kyle, Ryan, Gail, Natalia & Me
July, 2003: I wanted more than just the oven. I wanted a seating area and a make table. So I took Alan’s oven design (from the book) and added a bench and make table, then angled them “kitty-corner” from the oven. For this structure, I needed a strong foundation (pictured below - bottom right).
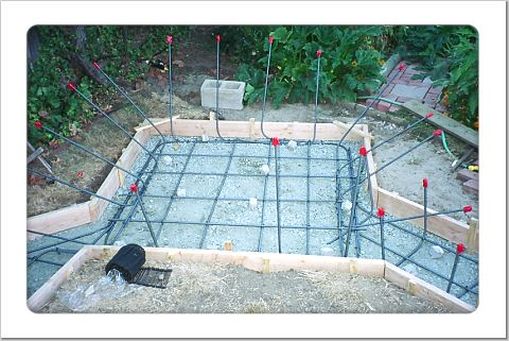 foundation preparation for oven, table, and bench
The foundation would have never gotten started if it wasn’t for my good friend Jerry Randel. Jerry lives in Southern Ca, and came up for a business trip. He saw the hole in the backyard and he wanted to build the foundation. Not wanting to refuse any friend who wants to help with pouring cement…. I said COOL! The next morning, Gerry showed up with all the supplies from Home Depot.
Pictured bottom right, is the foundation frame made out of 2”x8” wood, then the hole was filled with river rock gravel and tamped down firm. The gravel is level, and is filled from below the wood frame, up 2” inside the wood frame. This leaves 6” of wood frame left for cement.
The steel is ½” re-bar, centered 12” on square, with a re-bar frame 2” away from the inside of the wooden frame. Re-bar for the bench (right) and the make table (left) also continue into the oven footing 24” to tie everything together.
Next, rods of re-bar stick 40” straight up so that the “block” may be placed on top when the foundation is dry. The 40” high re-bar bends at a right angle an extra 12” along the bottom and is attached to the framed re-bar in the foundation with wire.The bench and make table were treated the same way with the steel re-bar. Except the height of the bench re-bar (for the block) is obviously shorter.
All re-bar is set on “dobies” so that the steel is in the center of the poured foundation. We then poured 50 sacks of 90# concrete. Jerry, Kyle, Ryan, Gail, and Mike Rottiere helped me with the cement.
The oven base...
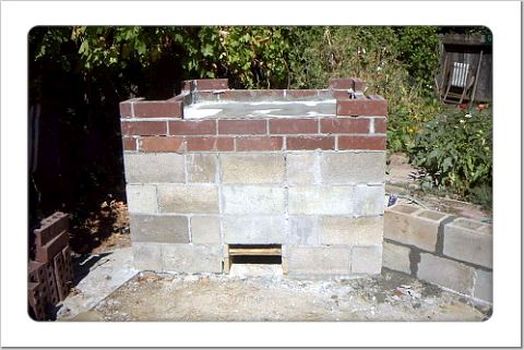 block base for oven and bench - before sand and final base
August, 2003: This picture shows the block foundation. All hats off to Al Giovanni, (my cousin), who set this block in the dead heat of August.
The block was set as a cage if you will. With some block interlaced in the front towards the middle to create a chamber for the ashes that will fall from the ash slot. Here is where we differed from Alan Scott’s direction.
Al Giovanni is a professional mason and has built outdoor kitchens and the like that have included pizza ovens. Until this project, he had always used “kits” such as Mugnaini.
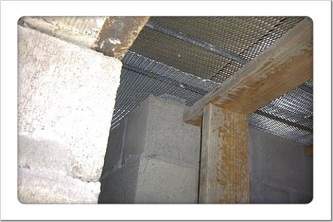
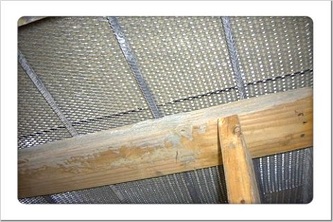
Below, is a picture that shows underneath the oven, with metal lath, braced by re-bar and wood.
August, 2003: With re-bar stretching across the open center of the block base for support, we placed a sheet of metal lath; forming a loose platform. We braced the re-bar with wood to temporarily support the weight of the concrete until it dried. Brown paper was then placed on top of the metal.
Next, we formed 10 foot, ½” steel re-bar, into the shape of an upside-down “U”. We placed them across the block (from back to front, and side to side), crossing every 12” on center, and down into the cores of the block. We then tied this re-bar to the existing rebar coming up from the foundation through the block.
We tied the crossing re-bar together and made sure the re-bar
was 2” off the metal lath. This way, when we poured 4” of concrete, the re-bar would be in the center. Kyle, Ryan, Gail & neighbor Dennis helped mix, pour and shovel 18 / 90# bags of cement.
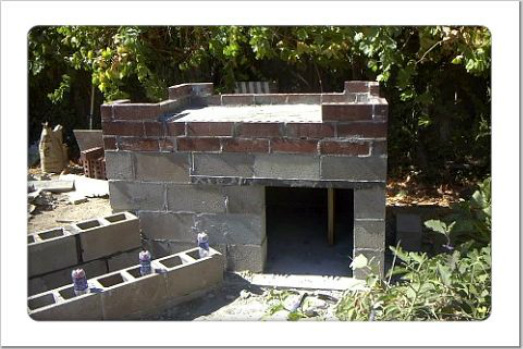
August 2003 Next, with the cement poured within the first row of bricks, I finished off the top row of Red Bricks for my 3rd and final row. 4” of sand will be placed on top of the cement platform (done by Natalia and Me). This will act as the insulation for the top layer of cement. The final layer of cement will be a platform for the hearth of the oven.
Alan Scott's plans call for a "floating base." One half is 100% cement and the other half is an insulated cement with vermiculite mixed in. The insulated cement acts as insulation for the hearth.
Al Giovanni's plans, insulate the cement base slab with 4" of sand. This not only gives the hearth a cement cladding of 4"
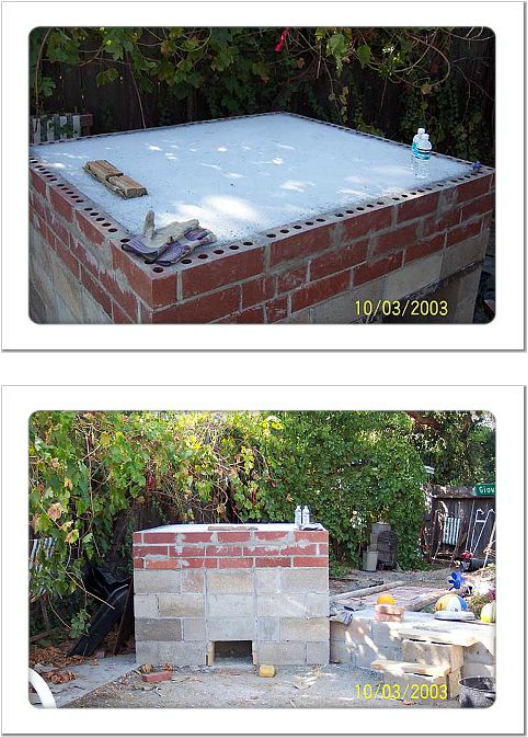
September 2003 It was now time to fill the last row of bricks with cement. On top of the sand, Gerry Randel and I placed ½” thick re-bar and crossed them 12” on center, with a border of re-bar 2” away from the sides of the bricks. We tied the re-bar and set the steel re-bar on cement dobies, so when we poured the cement, the steel will be in the center of the cement slab.
On top of this slab, we will place fire brick for the hearth of the oven. Note the wooden void block cemented in the slab. This void is the ash-slot.
The void will be removed. It was also used in the lower cement slab layer and in the sand layer, I layed 4" brick around the slot so that it would continue a solid chute with no disruption to the sand layer.
In the final design, ashes/coals will be able to be raked out of the oven and fall down the ash-slot instead of continuing out the front shelf. The ashes will then be cleaned out of the door/opening in the bottom-front of the base.
the side bench...
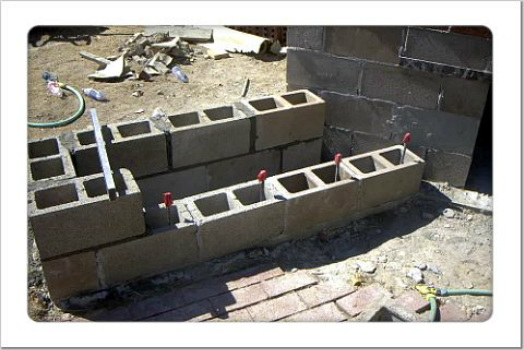
August 2003 Here is a close-up picture of the block being set for the bench. In the center of the block, Gerry Randel and I filled it up with scrap brick/block/re-bar and covered it all generously with cement to make a level surface.
The oven bricks...
December 2003 This was the 1st real exciting day of the oven project. For Christmas, my Sister-in-law Judi came up with the idea of everyone getting me a fire brick for the oven. So, Bless her heart, she organized getting fire bricks from the local masonry supply yard and gave 19 of them to my immediate family. They all autographed the bricks, wrapped them and put them under the Christmas tree. Some said “hurry up and finish!” some had requests on them…” pepperoni for me!” or “Make mine a clam and garlic.”
The 19 were: Gail, Kyle, Ryan, Natalia, Mom, Pop, Tami, Larry, Claire, Dan, Amy, New-Frank, Nick, Amanda, Bruce, Derek, Heather, Bernice, Jason.
The next morning, Christmas Morning, we went to Judi’s where not only did I open up 3 more under her tree…. But there were more in the garage! That brought the total to 104! Enough to do the hearth, walls, back, and dome of the oven!!
The hearth (unfortunately not pictured) has bricks mortared thinly to the concrete slab with no mortar between the bricks. Next, the walls are mortared together in a “soldier” pattern with the back corners angled so there are no “square corners.”
The interior of the oven is 32" wide by 36" long.
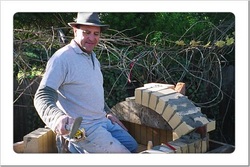
Next, I made the wooden arch form, which is 7” at it’s highest peak from the height of the future oven door. Here is a picture of Cousin Al laying the arch. The bricks were set in a mortar/fire clay mixture, not just straight mortar.
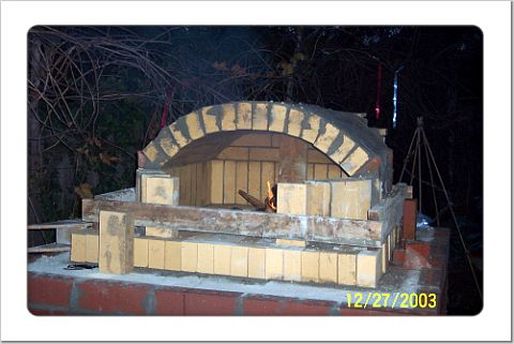
FIRST FIRE!!
December 2003 The First Fire! This day was my birthday. The same day as above. What a gift!!
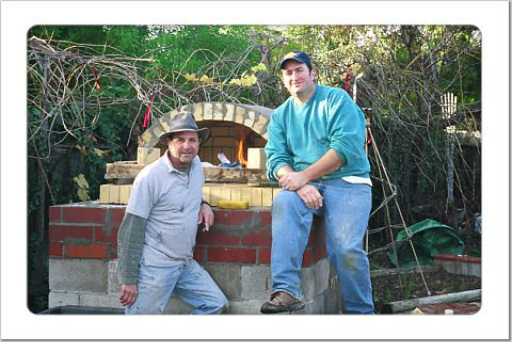
Alan Scott’s book actually says to burn small fires in the cavity of the oven to help the mortar dry and cure. I did it just for fun!
The facade...
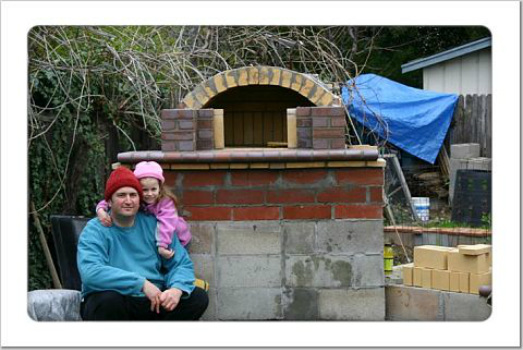
Later that week, I filled in all holes and voids with mortar/fire clay. I then made the door jam bricks which you will notice as the two blonde bricks between the read bricks in the next picture.
January 2004 May God Bless people with trucks, and may God Bless my buddy Jay and his truck.
For the facade of the oven, we decided to go with a Medium-Iorn spot brick. Bull-nose for the front ledge. My buddy Jay and I picked up the bricks on Saturday, because the next day…Cuz Al was coming by to set them.
Super Bowl Sunday – Al showed up early on the cold morning and set the front ledge. It curves outward in the center (in front of the oven opening), and really gives the oven a nice touch.
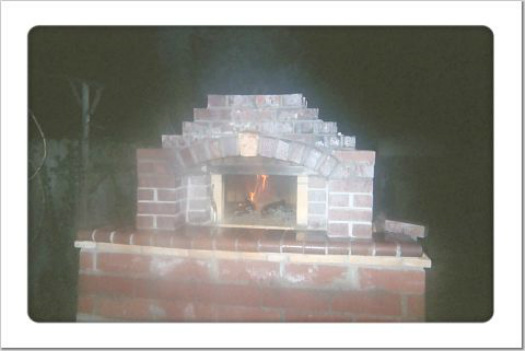
Next, the beginning of the facade. The weather was cold and wet so we decided to quit after the front ledge and the facade's side walls.
Later that week, I finished the downward slope of the oven arch(not pictured) and added the Angle Bar across the door-jam bricks. This way, Al could finish the facade, arch and get the chimney started.
Natalia and I were happy that day.
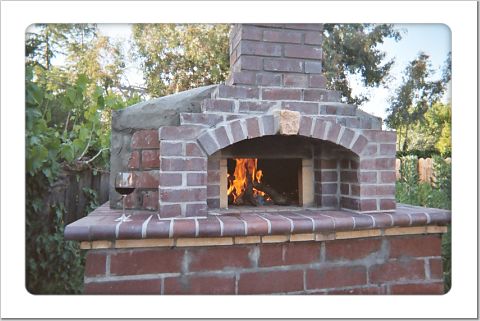
February 2004 On February 12, Al had some time and finished the front facade. And just in time! The night before, I had made the wooden arch form for the arch entry and that’s all he needed. He graciously provided the Keystone, which is a block of rough cut Granite. We followed Brian’s (Brian’s brick-oven folly) idea of letting the arch entryway stick out a little, with the Keystone sticking out even further.
Al got started the chimney as well. The chimney is the only topic in Alan Scott's book is not clear. But with Al's experience, worked out fine.
The picture is poor because it was raining outside when I had taken it. I should have waited but was too excited.
The oven cladding...
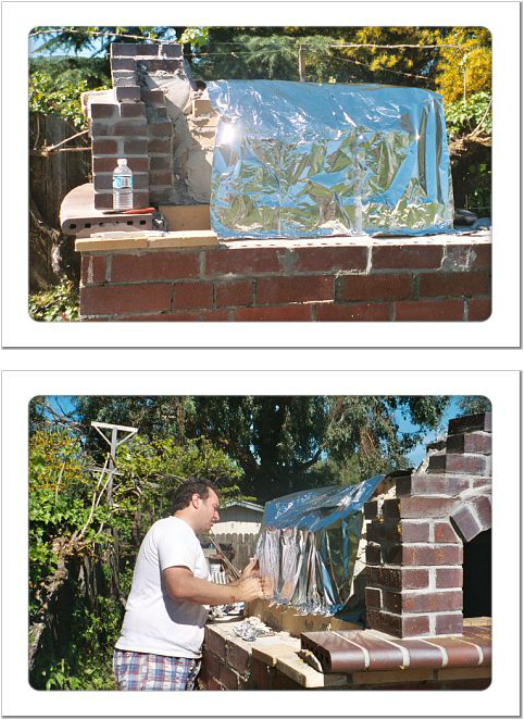
February 2004 There is something to be said for California weather. The mild winter allowed us to complete heavy jobs without getting baked in the hot summer sun.
The next task was to completely cover the fire brick form with a Portland cement based concrete. Now here is where one needs to make a decision and where the book really came in handy.
For bread baking, an oven’s concrete cladding should be thick. This is where the heat is stored to keep the bricks hot. An oven that will be used for Italian roasting or pizza does not need thick cladding.
Since my plans were to use the oven for primarily Italian roasting or Pizza, and occasional bread baking (maybe once a year…), the cladding of my oven is 3” on top and 2-3” on the sides.
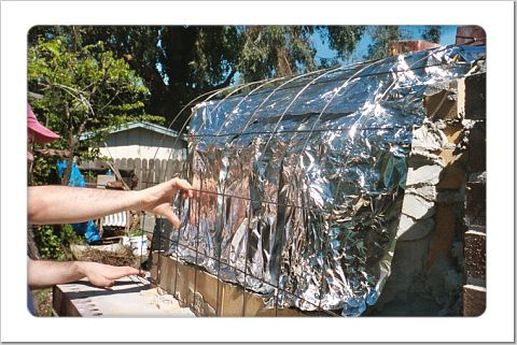
To do this, we first applied a layer of heavy-duty aluminum foil. This allows for “Slip” or slight expansion between the brick and the cladding. We then wrapped the foiled oven with a wire mesh. As with any concrete job, this helps give the concrete stability.
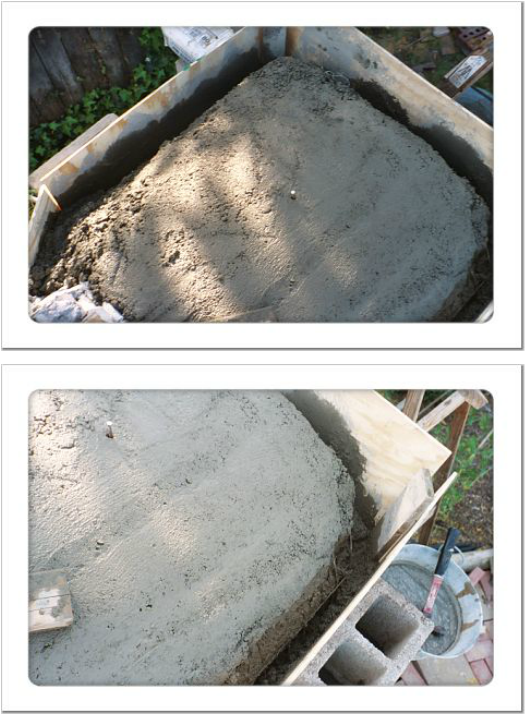
We then caged the structure with wood; distancing the boards the appropriate space (2”-3”). Make sure your boards are strong enough. (I say this from experience. Our boards at first were not strong enough and the boards bent as the concrete was filled.)We then mixed and poured. Derek, Heather, Gail and I were at hand that day.
While we poured the concrete, we constantly tamped the cement with a stick and used a hammer to “Bang” the sides of the frame. This promoted complete and dense distribution of the concrete all the way to the bottom of the frame. The concrete cladding consisted of around 10 bags of 60# concrete.
insulating the oven...
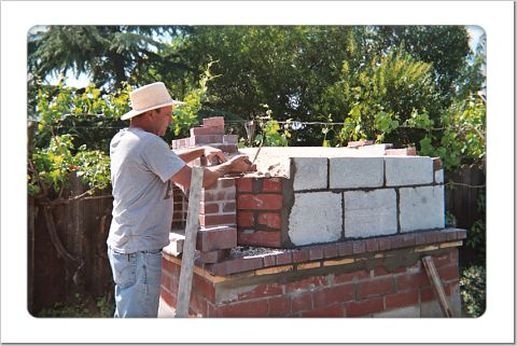
March 2004 Once the cladding had dried hard, the wooden frame was removed and inspected for defects. There were a couple of empty holes (so to speak), so I went through and patched any spots that were not solid.
It was then time for the enclosure. Alan Scott’s book recommends many different options to enclose ovens. After searching the web for months, I found two that I liked but WoodfiredPizza.org nailed the design for me.
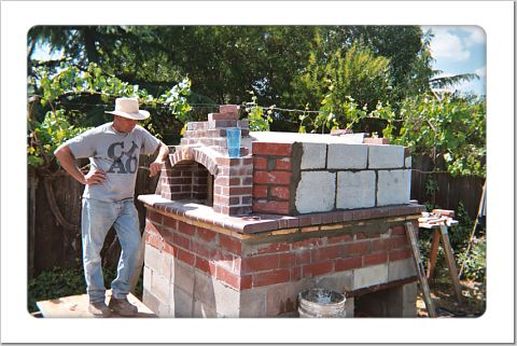
I didn’t like the “house” look so much and my cousin AL suggested stone (as with his other projects). Stone was very tempting, but budget and style preference led Gail and I to the following decision. We wanted to see “brick” since it was a “Brick oven” and I liked the “stucco”/rounded corner look.
I had no idea how we were going to top the oven, I just knew that I wanted to be able to touch any part of the out side of the oven and have it be cool to the touch while the oven was hot.Well, leave it to Al. He found cement block that was tall, long and only 4” wide. This would be our “cage” and the top I’ll describe later.
Al proceeded to enclose the sides of the oven with block and brick, leaving 2” between the concreted oven and the block/brick (this space we would later fill with vermiculite). In the back of the oven “cage.” We created two ventilation holes that I would later cover with screen.
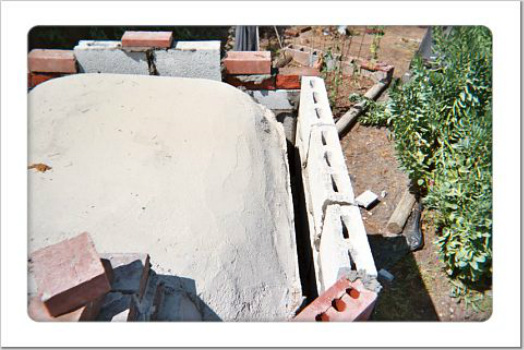
With the sides fully enclosed, I then filled between the block and oven with vermiculite. The vermiculite insulates the hot oven.
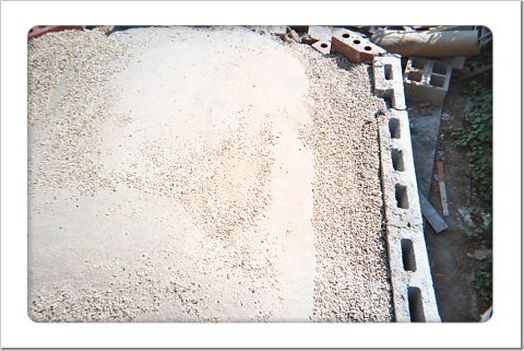
Note: Oven covered with Vermiculite
enclosing the oven...
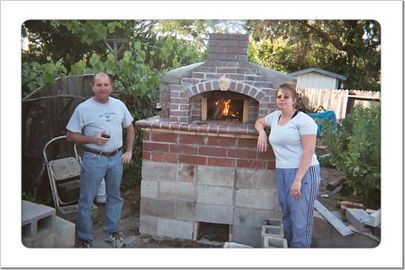
To enclose the oven, we ran ½” re-bar from the top of the front of the oven, to the top of the back of the oven, every 8” or so. We then laid metal lath on top of the re-bar and tied it into the “block” sides.
I mixed and poured concrete on top of the lath, while Al, did his thing. Using a trowel and the wooden float, he distributed and smoothed the concrete (2” thick or more) to create a roof.Here’s where I made a mistake. I thought I read that I was to leave the top of the oven free of vermiculite. I was wrong. In speaking with Alan Scott (again, what a great help and a true gentleman) he advised me that YES, I was to cover the entire oven with vermiculite.
To correct my error, Gail and I blew in extra insulation through the ventilation holes. Then, to make sure that we got all the way to the front of the oven, we cut 2 12”x10 holes out of the oven’s roof enclosure, removed them, and then packed it with more vermiculite. (I then felt comfortable we did it right) The oven was now structurally complete and ready for use if we wanted
We just couldn't wait to make pizza!
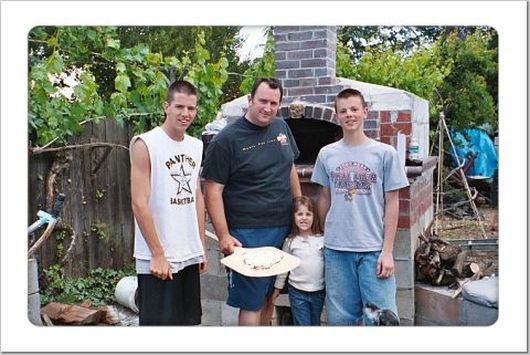
March 2004 With the oven structurally done, we had to see if the damn thing worked! So, with Cedar wood from our neighbor Curtis, we fired up the oven. The echo of the popping and crackling fire was very exciting. The fire was hot. Within 2½ hours, the inside temperature reached over 900Ëš which is too hot.
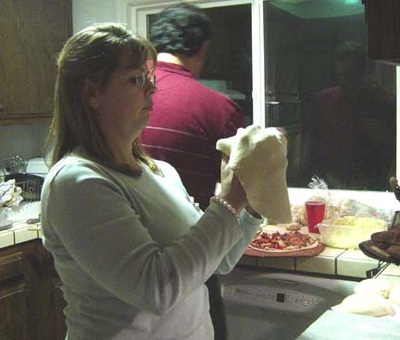
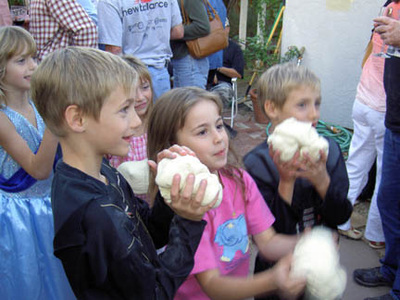
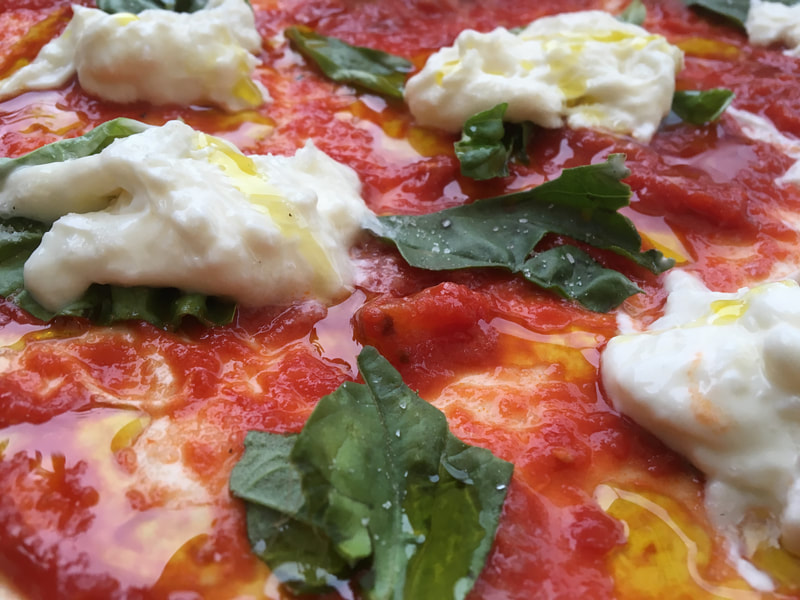
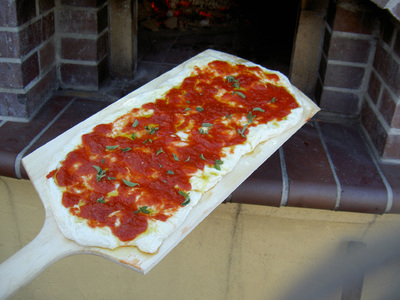
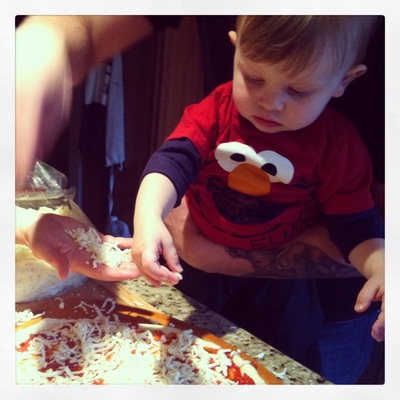
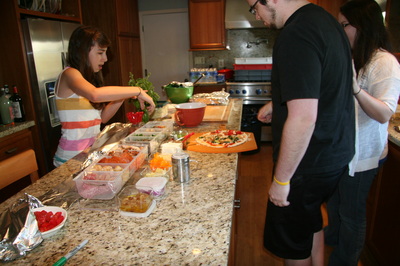
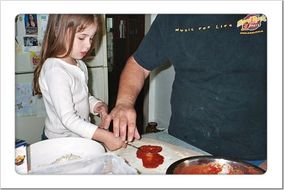
Regardless, I went to a friend’s pizza shop and he gave me some dough balls. We stretched the dough into pizza skins and Natalia & I sauced ‘em while Ryan & Kyle topped it with Cheese. (Gail was taking pictures)
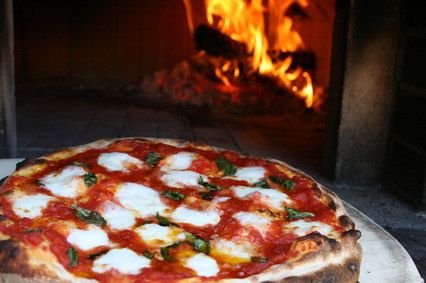
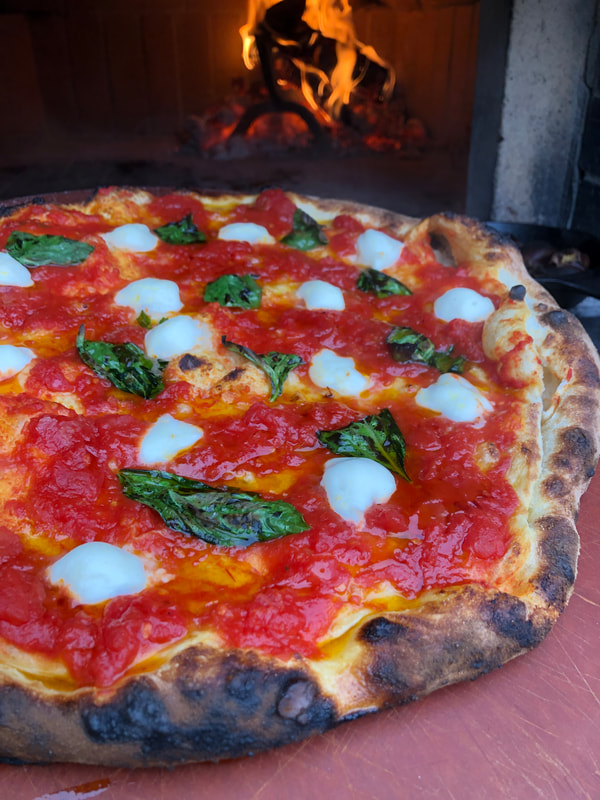
Into the oven it goes and maybe 90 seconds later….. PIZZA! The bottom was burnt.. but the top was good. We had some better pizzas come out that day but all in all… it was fun. I have since learned how to operate the oven much better, and I discuss it later in the page.
One important note: on this day, we noticed steam coming out of the cracks of the cement top. This worried me. But after consulting with Alan Scott via email and phone, (a very nice man) he assured me that this was normal. “The steam is from the cement cladding drying/curing” he noted, “…it will stop as the oven cures.” He was right. It did.
One important note: on this day, we noticed steam coming out of the cracks of the cement top. This worried me. But after consulting with Alan Scott via email and phone, (a very nice man) he assured me that this was normal. “The steam is from the cement cladding drying/curing” he noted, “…it will stop as the oven cures.” He was right. It did.
Stuccoing the oven...
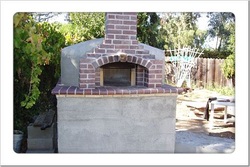
June 2004 Stucco time! Borrowing tools from Al, (a hawk and comb), I did my first stucco job. The pictures to the right are is a picture of the “base coat.” Some good advice from Brian’s page was to buy a book about masonry work. He stated that the craft has not changed that much so one could find an older, used book to learn tricks and methods. I bought a $2 book on EBAY and learned about how to stucco. First I did the base coat on the base of the oven and bench, then later on did the oven itself.
For those of you that have never done stucco before, it just takes practice. The base coat, when applied to block, needs to be put on then combed to create slight ridges in the stucco. This gives the finished coat something to grab onto.
For those of you that have never done stucco before, it just takes practice. The base coat, when applied to block, needs to be put on then combed to create slight ridges in the stucco. This gives the finished coat something to grab onto.
July 2004 White / Finish stucco coat. What a difference between the two products. The white stucco and the base stucco performed completely different.
I did this the same way. The base and bench first, then the oven. I also varied the texture of the stucco. I floated the oven stucco a bit smoother than the base. I wanted the two to look different.
I also chose white, uncolored stucco because I was a little unsure of how I would perform on the color balance within the mud. So I opted to paint the stucco later.
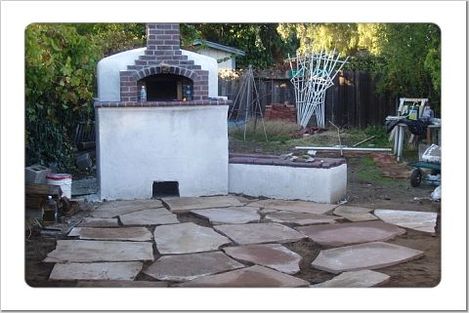
August 2004 To complete our Italian Patio, Gail and I wanted Flagstone. Here is where we removed the dirt in the area and replaced it with 2-3” of sand. The large flagstone pieces were placed where we want them, then, smaller pieces will fill in the large spaces. The cracks will be filled with crushed granite.
final touches...
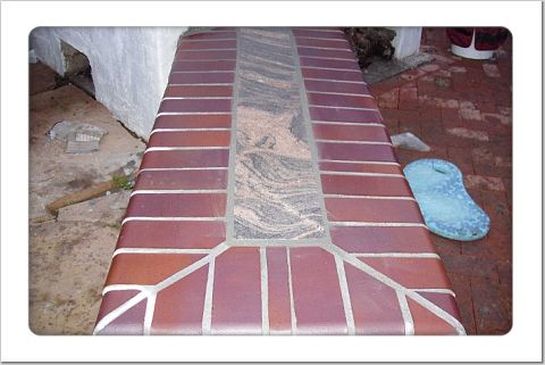
August 2004 The Bench. Ok, bricks without cousin Al.Throughout this project, I supported Al while he did 99% of the brick laying. I mixed mortar and cement, moved and loaded bricks, but now this was my turn. Gail came up with the idea of adding brick to the bench of the oven so it would tie-in with the brick on the oven base. Great idea.
So I studied corners and remembered how Al, did his brick buttering and went for it.
Later, (with additional bricks from Tami, Larry & Claire) I finished the oven bench with bricks. Gail and I cut a nice piece of granite for the center of the bricks. We are going to top the make table with the same granite and brick to tie everything together.
June 05
Here's Gail painting the oven.... Rather than stucco color, we decided to paint. The first base coat is a yellowish color, the top coat will be a dark-rust orange. Thus giving a marbled faux effect.
Here's Gail painting the oven.... Rather than stucco color, we decided to paint. The first base coat is a yellowish color, the top coat will be a dark-rust orange. Thus giving a marbled faux effect.
alla famiglia...
June 05
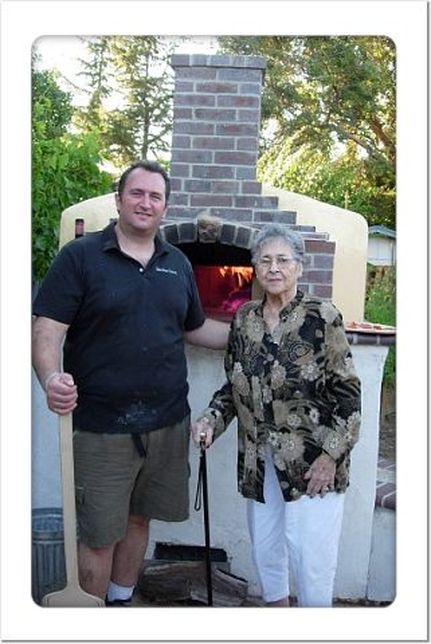
To the left is my Aunt. Josephine Cardinale. Auntie Pina.
Auntie Pina, and her husband, Gaetano Cardinale (Uncle Tom, as we called him), owned and operated Cardinale Bakery for many years.
I have very fond memories of Uncle Tom and his HUGE classic Brick oven. He made bread and served restaurants, retail and local markets.
The bread was delicious.
I'd go see Uncle Tom in the wee hours as he was baking bread for the days business.... and he would always get a kick out of me helping him move the hot loaves he removed from the oven... as I burned my hands.
My Aunt is a great influence on my Italian/Sicilian style way-of-life and cooking.
I hope to bake bread this fall.
Thank you!!
Kyle, Ryan, Natalia & Gail: For digging, cementing, cleaning, lifting, moving... you name it.
Gina Hendrickson: Cement Blocks
Al Giovanni: Supplies, Equipment, Knowledge, Hard Work, Time, Advice, Key stone
Jerry Randel: Motivation, Hard Work, Supply Gathering, Building Knowledge.
Alan Scott: Advice, Inspiration, and conversation.
Jay Smith: Truck use, pictures, support.
Derek & Heather Giovanni: Cement Pouring
Paul Pishos: Granite
Judi, Peter & Laurel Hagen: FIRE BRICKS!
Mike Rottier: Cement Mixing and Pouring
Dennis Braun: Cement Pouring
Curt Ashford: Wood/fuel
Steve Fosenberg: Hobart Mixer
Frank & Tony Gemignani: Advice and pizza prepping!
John Brennan: Dough Popper - Slicer!
Craig at California Stone Pizza Table Top
